Saving Outlook Email Messages
There are several ways to use MessageSave to save Outlook messages as individual files outside of Outlook . You can save messages to a local hard drive, to shared network server folders, to sync services such as OneDrive or Dropbox, or any other file system location. You can run MessageSave manually, or you can configure it to save messages automatically, without requiring any action on your part.
MessageSave also supports saving attachments in the same file as the message itself, or as separate files alongside the saved messages messages.
- To save messages manually, invoke MessageSave by clicking the Save Messages button on the Outlook toolbar, ribbon or right-click menu.
- To save messages automatically, configure Mapped Folders and Scheduler on the AutoSave tab of the Advanced Options window.
Running MessageSave manually
To open MessageSave, click on the MessageSave button, which is located on the Home tab of Outlook’s Ribbon.
Tip
MessageSave is also available in the right-click menu in the main Outlook window.
You will see the Save Messages window:
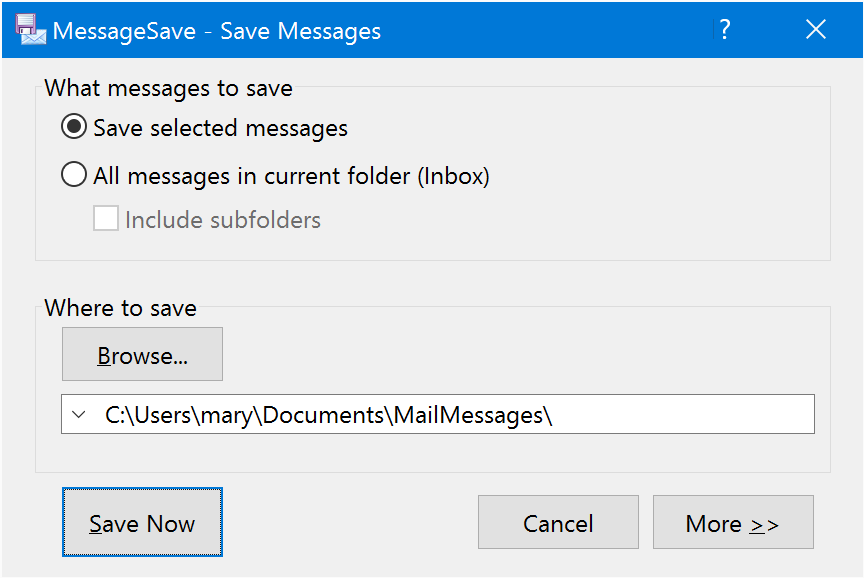
- Specify whether you would like to save the selected messages, or all messages in the current folder in the Messages to Save area. To save a group of messages, highlight them before clicking on MessageSave.
- Click Browse to specify the destination folder.
- (Optionally) Click More >> to specify additional options.
- Click Save Now.
Next time you invoke MessageSave, it remembers the options you used previously. So if you are saving with the same settings, you can simply click Save Now.
QuickSave
MessageSave QuickSave feature allows you to save messages without opening the Save Messages window. The most appropriate folders for the currently selected message are shown as QuickSave menu items on the MessageSave drop-down. Click on one of those folders to save the selected message into it.
You can control how QuickSave folders are selected (folder suggestions vs. most recent) in the Destination Preferences Window.

Automatically saving Outlook messages
MessageSave allows you to map Outlook folders to file system folders, such that whenever a message is moved or copied to a particular Outlook folder, it is automatically saved to the corresponding file system folder.
If you have folders for your projects or clients in both Outlook and file system (local hard drive or a shared drive on a file server), you can easily keep them in sync.
To configure:
Open the AutoSave tab of the Advanced Options window. ().
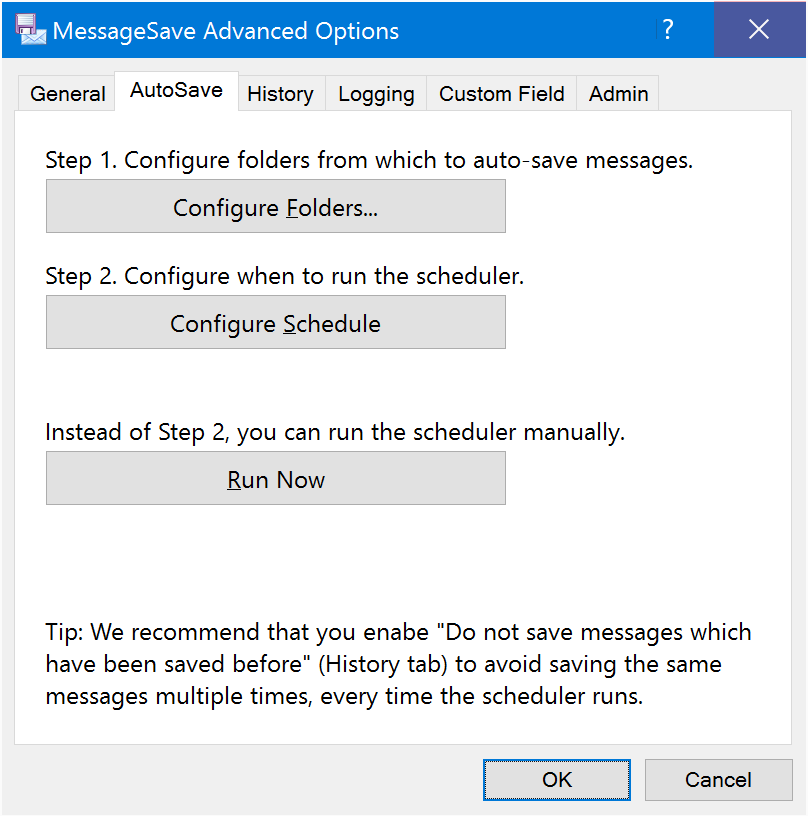
Click Configure Folders to open the Mapped Folders window.
Click Add. You will see the Folder Mapping window.
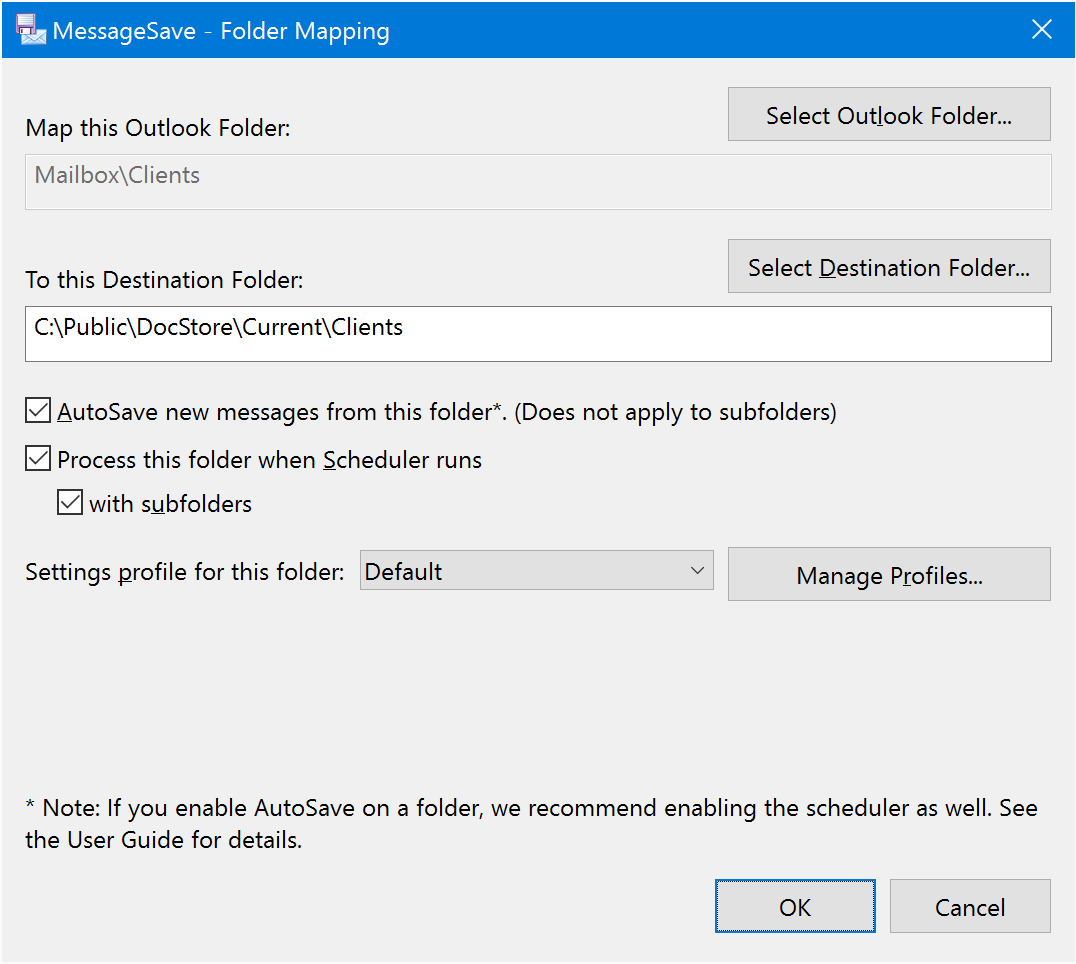
Select the Outlook folder you would like to map.
Specify the corresponding destination folder.
Check Process this folder when Scheduler runs.
Optionally check AutoSave new messages from this folder if you would like messages saved as soon as they appear in the folder.
Click OK to close the Folder Mapping and Mapped Folders windows.
Back on the AutoSave tab, click Configure Schedule to set Scheduler interval.
Now whenever a new message lands in that folder, it will be saved in the folder you specified.
Warning
In most cases when using the scheduler, you want to enable “Do not save messages which have been saved before”, located on the History Tab of the Advanced Options window. Otherwise, a new copy of every message will be saved every time the scheduler runs.
Note
AutoSave only works when Outlook is running. If a new message arrives directly into that folder when Outlook is closed, AutoSave will not pick it up. To deal with cases like that, also configure a scheduler for the same folder whenever you use AutoSave.
Tip
AutoSave is a perfect feature to use in combination with our SimplyFile product. SimplyFile is a much more efficient alternative to filing email messages into Outlook folder using drag and drop.
Automatically saving new messages using Outlook rules
You can use Scheduler in combination with Outlook rules to automatically save new messages which match a set of criteria you specify. This works on both received and sent messages.
- Create an Outlook rule that matches the messages which you would like to save. See the Microsoft website for instructions on creating rules.
- In the “What do you want to do with the message?” step select “move a copy to the specified folder”.
- Click on the “specified” hyper link in the lower pane to select a folder.
- Finish creating the rule as usual.
- Configure MessageSave Scheduler to run on the folder you specified above to automatically save all messages that land in it.
Please refer to Outlook documentation for details on creating and working with rules.
Tip
You can configure multiple rules and mapped folders for different types of messages.
Tip
Using MessageSave rules is an easy way to save every single message you ever send or receive. To do that, create two rules using instructions above. One rule to save messages you receive, the other - for the messages you sent.
We recommend that you use the Use Message Date subfolder naming option in this case, so that your messages are well organized and to avoid accumulating too many messages in a single folder.